Getting a decent looking avatar is pretty easy for a personal account. All you need is a decent shot of your face, right? Get mostly your face with the eyes lined up on a third (you know the rule of thirds) against a background that doesn’t detract from your face and you’re good.
It can be quite a bit harder for organizations, especially if you have a brand that isn’t represented by curso de ciencia de dados EBAC the main logo. In my temp assignment at U.Va.’s Office of Engagement and Annual Giving, this issue came up.
U.Va.’s graphic identity is pretty easy most of the time. All we have to do is slap a Rotunda on it. The HoosNetwork case is different because it’s a new brand and it’s got enough different ideas running around and through it that the Rotunda, at least by itself, doesn’t communicate what we need. The Rotunda is U.Va. and U.Va. is the Rotunda, but this doesn’t work for HoosNetwork and the Rotunda. (It doesn’t always work for U.Va., in my thinking, either.)
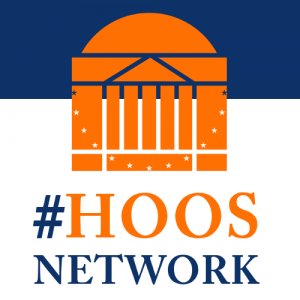
HoosNetwork started as a Twitter handle, @HoosNetwork. As we started developing more and more content, on our own and with alumni, on the UVA Global Network, HoosNetwork developed into a concept for a content channel. The Director for Engagement Strategy worked with a designer to get a logo.
HoosNetwork graphic identity
The downside is that this logo doesn’t work so well for Twitter. It looks great at higher resolutions, but is crowded, jumbled and illegible at something like 48×48 pixels. The Twitter handle is not an exclusive property for HoosNetwork digital events. So what can you do?
 Text-heavy avatars were tried, with drop shadows and outlines. One version included a Rotunda; another version was text only. It wasn’t working. One problem was that the text logos were done at low resolutions so they didn’t look good if a user clicked on the avatar to zoom to full size. The drop shadows and outlining techniques didn’t play well at the lower resolutions. While I like the minimalist philosophy, this simple text and two color look was too simple.
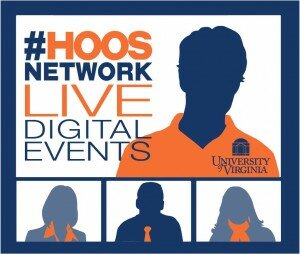
I hadn’t worked on an avatar for Twitter before so this seemed like the perfect opportunity. I came up with something that looked pretty good and worked pretty well, but it took some trial and error to get there. I think this avatar works because it does a handful of things really well: (1) it gets the message out, simply (hashtag HoosNetwork! and we’re with U.Va.–didn’t you see the Rotunda?), (2) it stands out amongst all the “regular” avatars of people’s faces, logos & indistinguishable graphics, (3) it’s in the ballpark of current design trends, (4) it is recognizably related to the HoosNetwork graphic identity shown above and (5) it looks good at all the different sizes Twitter displays it.
HoosNetwork Twitter avatar
Here are a few things to remember when you’re rolling out your own homegrown profile pic or logo for Twitter.
-
Have a plan.
It’s okay to deviate from the plan, but having an idea of what you’re doing is much better for directing your creative flow. It also helps to have some idea of what you’re going for so you can know when you’re done. The potential for fiddling is real. -
Allow yourself to be inspired, even if you’re not a designer.
I’m not a designer. That’s surely obvious by now. Like anyone working on the web, I like to think that I appreciate good design. In this case, my initial inspiration was the color blocking trend in fashion. -
Be aware of current design trends, even if you don’t know what you’re doing.
I don’t know a whole lot about flat design, but I was pretty sure that drop shadows and text outlines looked bad to me partly because they seemed out of place in contemporary design. -
Know your parameters.
Twitter posts avatar dimensions. Facebook and others do it for images as well. Twitter avatars have to look good at the most commonly displayed sizes, 48×48 pixels and 73×73 pixels. But they also have to look good at sizes as small as 24×24 and as big as 500×500. This is why simplicity helps in designing an avatar. Lots of text and creative flourishes may look great at 500 pixels, but does it scale down to 48 pixels? -
Try many versions.
Try new ideas, jump off on tangents, play around with something just to see what it looks like. Remember to save your work and to track your versions. I came up with nine different candidates, mostly variations on the initial theme. Each one helped clarify my thinking for the next. -
Don’t go with your favorite.
I come from a writing background and the mantra, “kill your darlings.” You may really love what you come up with on one run, but remember to ask the important questions. Does it look great at every size? Will the user get what you’re trying to communicate? Does it make sense with your organization’s existing brand and graphic identities? -
Get an outside opinion.
After you’ve worked up a few versions, show them to someone else. You need to respect this person’s opinion and also trust them to be honest. Getting an outside opinion isn’t about having someone else make a tough decision for you. In my experience, showing your work to someone else, explaining it and walking them through your process goes a long way towards clearing up your own feelings on your work. It’s likely you’ll have a good idea of what works best and looks best after talking it through with a trusted colleague or friend.
Follow these steps and put the time in. You’ll have a good chance of coming up with an avatar that looks great and communicates your message while still being a design n00b.
A word on software. I’ve used both Adobe Photoshop and the free/open source GIMP software for photo editing. I’ve found that I very much prefer GIMP to Photoshop for tasks like this one that involve logo and text graphic manipulations. It was simply quicker and easier to get where I was going for this project using GIMP. If you haven’t used it, then you should try it out. It’s free software, in so many ways.
Finally, I can’t talk about the need to create and play with multiple versions without showing the goods. Here’s a gallery of the iterations I went through to get to the final avatar displayed above.
[AFG_gallery id=’2′]